Ap.Setup Steps For WiFi Extender
Live Chat
Live Chat with our experts & get real-time answers to all your queries.
Chat Now
You can access Ap.setup only when your Wavlink extender is connected via wireless or wired to the device. Note that it is also possible to configure the AP new extender using WPS Extender Setup.
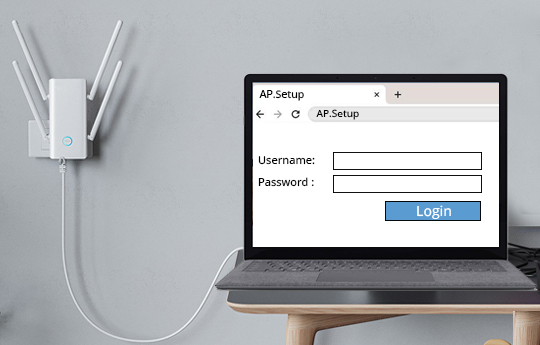
Ap.Setup
With a web browser like Google Chrome, Edge, or Firefox, you can access Ap.setup from any device. Connect your device to a repeater so you can connect to http://ap.setup without any problems. An alternate IP address for the Ap Setup page is 192.168.10.1. For assistance with the AP setup web user interface, please contact our Ap support team, who are trained to assist.
Using Ap setup, you can configure your repeater as follows:
Wavlink WiFi Extender Ap.Setup
The Wavlink Range Extender is an excellent tool to extend the range of your Wi-Fi network. With the Wavlink app, you can install your extender in a few simple steps.
Follow the step-by-step guide to configure Wavlink Range Extender:
AP Configuration For Wireless Extender
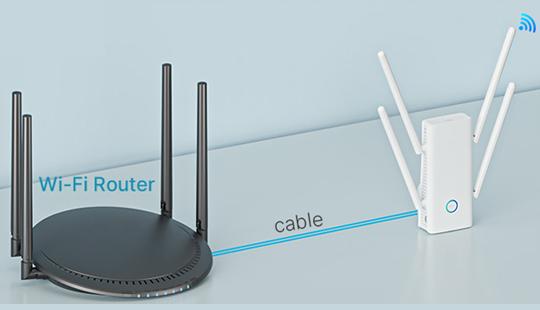
For AP configuration, plug in the range extender. Then, connect it to your router. To access the extender web management page, you will have to open a web browser. Type http://ap.setup and press enter to access the extender Ap.setup page.
When prompted, enter the username and password, then click OK to log in. The default username and password are admin. You will now see the AP.setup Wizard page on the display. If not, click on the Navigation pane on the left side of the screen. Click Next to proceed with the AP configuration process or Skip for later if you choose not to configure your new device. Then follow the below steps:
Step 1 – Choose Your Local Time Zone
In this step, you’ll choose the local time zone where you want to set up your extender. To set the time zone, click on Time Zone and select the most nearby location. If you are unsure of which time zone to choose, click on More Time Zone and enter the location. Click Next.
Step 2 – Choosing a Network Mode
Under Network Mode options, choose the network mode that you need to connect to your device. The options include:
If you want to set up a new wireless network from your extender, select Create New Network. On the other hand, if you want to extend the range of an existing wireless network, select Extend Existing Network.
Note: If you choose to Create a New Network, your extender will automatically be connected with any device that has been configured for connection in the same way that it was previously connected – for example, using WiFi Protected Setup (WPS) or setup through your smartphone or tablet’s web browser.
Step 3 – Name Your New Wireless Network
Now you can perform various tasks like setting up WiFi extenders, configuring network settings, resetting the device and much more from here.
Ap.setup Using A Mobile
How can I do Ap.setup Using A Mobile?
If you have recently purchased a WiFi extender, then this article is for you. We will help you with the Ap.setup installation of WiFi extenders using mobile devices. So let’s start now.
Turn on your WiFi extender
To set up your router, you’ll need to turn on your WiFi extender. If it’s not already powered on, plug in the power adapter and press the reset button for 5 seconds.
Once you connect your router to an Ethernet cable from a modem or network port, connect another Ethernet cable from the WAN port of your router to one of the LAN ports on your WiFi extender. Then plug an AC adapter into a wall outlet or insert batteries into its battery compartment. Plug this into a power source such as a USB port on a computer or laptop via a USB cable that came with it
Open the Browser
To complete the Ap.setup process for a WiFi extender, you need to open the browser on your mobile device and go to ap.setup. The WiFi extender should be connected to the same network as your mobile device. Enter all the information that the portal will ask for. For example, enter the admin username and password:
Do this If you Forgot Your Admin Credentials
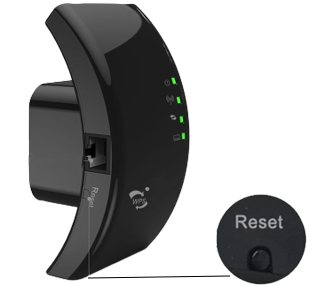
If you have changed your admin username or password and forget it, then reset your Netgear WiFi extender to its factory default settings.
To reset the extender:
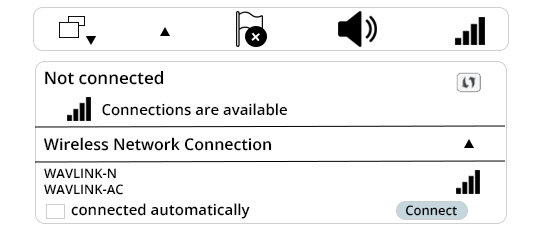
Now, connect to the _ext network
Once you are connected to the _ext network, click on Continue. The login page will appear on the screen. Next, enter your credentials and then proceed to configure an SSID or SSIDs (there would be one or more) for your WiFi extender. You can also enable WPS if needed as well as set up encryption options like Passphrase and Encryption type (TKIP/AES).
Once done with all these settings, save them by clicking on the Save Settings button at the bottom of the page. Connect one last time from your smartphone or tablet device using a wired Ethernet cable into ports 1-4 of the APS device without changing any other settings.
Log in
When you log in successfully, the setup wizard (wifi.wavlink.com) will appear on the screen. Choose your desired location for the Wifi extender setup and click next. The next screen is where you set up a new wireless network. You can either choose to create a new WiFi name and password or use what’s provided by your ISP (Internet Service Provider). If you opt to create a new one, just type it in the box that appears after clicking “Click here if you want to use custom settings”.
You can also change other settings like security settings using this tab. Just follow through with all necessary steps until arriving at the step which will ask you if there is an existing wireless network nearby that can be used as an AP (Access Point). Select yes or no depending on whether there is one nearby or not and click finish after doing so
Select the Name of Your Existing Wireless Router
Select the name of your existing wireless router and enter its Password then click next for further instructions. Your mobile will connect to a WiFi extender. You can now access all the settings on your PC or laptop via a WIFI connection with your phone or tablet.
After Configuring, your WiFi Extender is Ready to Use
Now that you have configured your extender, it is time to test it out and make sure everything is working correctly. The first thing you should do is connect to the internet using a WiFi device such as a laptop or phone. This will allow you to see if your extender’s configuration was successful. If there are any problems with the connection, try rebooting your extender by unplugging it for a few seconds and plugging it back in again. If this does not solve the issue, contact our customer service team
What to do if I Can’t Access Ap.setup?
If you’re having trouble accessing the Ap.setup for the WiFi EXTENDER setup page, there are a few things you can do to try to troubleshoot the issue.
Make Sure Your Computer and Your Extender Are Connected to the Same Network
To make sure that your computer and your Extender are connected to the same network, please follow the steps below:
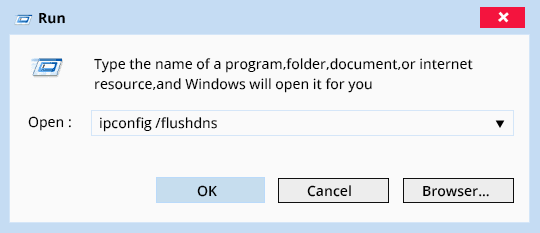
Check the status of the Extender. If it is connected, but you still cannot access it through its IP address or through its Web interface, then it means there is a problem with your computer’s network settings. In this case, try to reset all of them by following these steps:
Make Sure Your Computer is Connected to the Correct Network
If you’re having trouble accessing the Ap.setup for WiFi EXTENDER, it’s possible that your computer is not connected to the correct network.
To fix this issue, try these steps:
Check the Default Gateway or IP Addresses
Make sure your computer only connects to the correct network. Check that your computer’s IP address and gateway addresses are correct. If they are not, you should change them manually. Or try to find out which ones have been assigned by the DHCP server on the local network. You can check whether your IP addresses are correct by using the Ping command in the Command Prompt window.
If none of these steps work for accessing an ap.setup, ask our team for help.
How to Perform AERIAL D4X -AX1800 AP.Setup
The AERIAL D4X -AX1800 AP is for users who want to extend their existing wireless network coverage. Or those looking for a complete solution for home or small office networking needs. Users can simply connect the device to an internet source and it will do all the work for them after executing these steps:
Thereafter, the AP.setup Wizard will appear automatically to guide you through the quick setup of your new AERIAL D4X device. If it does not, click on “Network Setting” in the left-hand navigation bar and then click “Run Setup Wizard” on the bottom right-hand corner of your screen. On this screen, you choose your country and enter the local time settings for your location. Click Next to continue.
In this step, you can download and install the newest firmware for your device using the Firmware Upgrade option, or you can do this later if you like by clicking Skip. Finally, you will have to configure your internet connection and wireless settings. Congratulations! You have now successfully configured your AERIAL 4X device.
Ap.setup is Easy to Install
Now, you have all the knowledge you need to install a WiFi extender through AP.setup in your home or office. This product is incredibly useful because it allows people who live in areas with weak signal strength to connect to the internet with ease. However, if you’re using this device for the first time, you may encounter AP.setup errors. Feel free to reach us in such scenarios for help.
Common Wavlink Extender Setups
Some Issues You Might Face
If you are facing any issues then please contact us, and we will be happy to help you.